What I Did
Overview
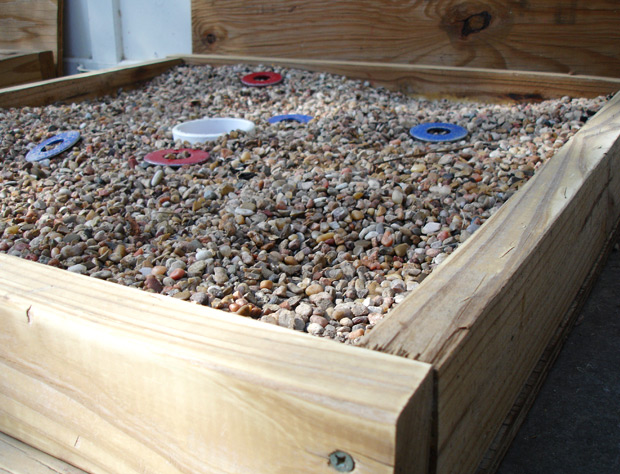
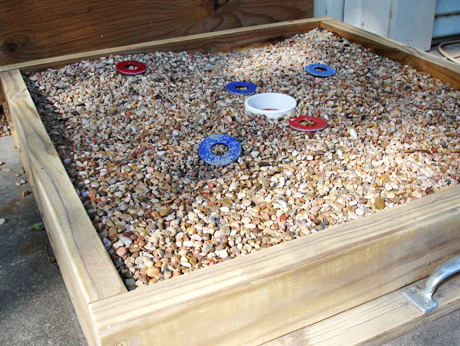
This is one of the first projects I decided to do once I moved to my current house. Washers is a bit of a redneck game, but is one I have grown up playing and have always enjoyed. It’s a simple game that can be played with washers in one hand and a beer in the other. Normally the game is simply just a pvc pipe cup dug into the dirt with a sand or dirt pit. I didn’t want to mess up our yard so I built these above ground pits and put them by the garage. I also opted for river rocks for some added challenge.
What I Used
Wood of your choice // Wood Screws // Power Drill // Miter Saw or Circular Saw // Washers and PVC pipe // Guerilla Glue // Metal Handles
How I Did it.
This is a relatively simple project consisting of a plywood base with 2x4s cut to size and then affixed to the base. I used pressure treated wood because it holds up to the elements well. To affix the hole to the plywood base I used quick drying Guerrilla Glue (I love all the Guerrilla Glue products, they are awesome).
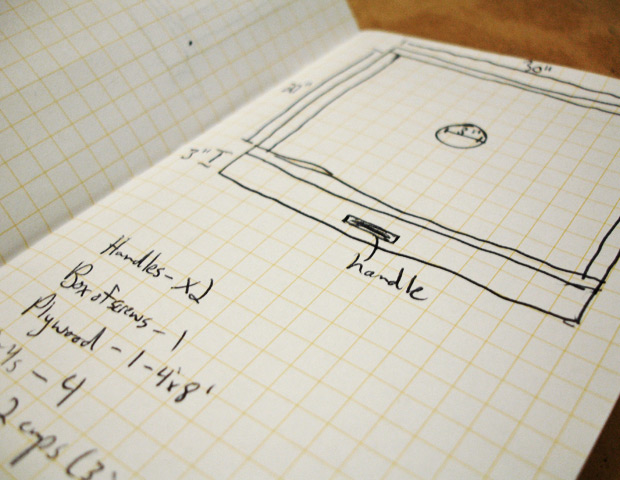
I opted for a 30” x 30” pit because that size just felt like a pretty good size. It might not be “regulation”, but in this game can be played on all kinds of pits. I also went with a smaller pvc pipe( 3in diameter as opposed to the standard 4inch), because I have always grown up playing with that size cup.
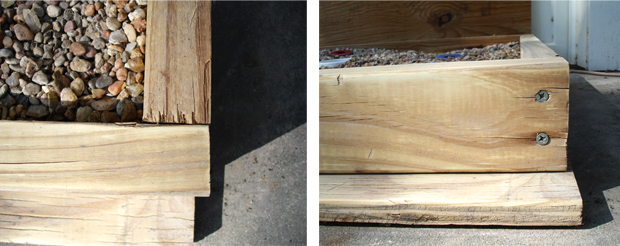
1. I cut my plywood sheet to 2 – 30” x 33” pieces for the base. I allowed extra room on one side for the handle I wanted to put in so I could drag the pits around when I needed to.
2. Next I cut 4 of the 2x4s to 30” and 4 others to 27″ so that together they will make a 30″ x 30″ square since the wood is 1.5” thick.
3. I assembled all the walls using 3.5” wood screws. Now I should have 2 bases and 2 sets of 30” x 30” walls.
4. Set the base on top of the walls and position flush. One side should extend 3 inches passed the walls to allow room for the metal handles.
5. Next I used 3.5” wood screws to join the base and the walls. I used 3 screws per side to make for a tight seal, then repeated with the second board.
6. I flipped the boards over now that they are assembled and am ready to attach the pvc holes.
7. The hole needs to be centered in the middle of the board, so using a pencil I made a diagonal line from top left corner to the bottom right corner and repeated with the top right corner to the bottom left to make a big “X”. This should give me the exact center spot.
8. I put the hole down in the center and traced around it. Then I removed the hole and put a generous amount of Guerrilla Glue where the traced line is and on the hole bottom of the hole as well. Then I put the hole back on that spot and put a brick on top of the hole to hold it in place while it dries.
9. Once everything is dried, I flipped the board over and drill some drainage holes all over the board so if it rains the water will not fill up inside the hole or the pit.
10. I attached the metal handles to the area of the base I allowed for them next.
11. Finally, I used some river pebbles to fill up the pit, and called some friends over to christen the new pits.
Finished Product